Trying out MithrilJS

These days, when you start a new project and want to pick a tool for front-end development, there are 3 options that most people will go for: react, Angular and Vue.

I’m not really good at front-end development. I have only worked with Angular for a short time, and it has always been my go-to framework at front-end. As I don’t have experience with react or Vue, I cannot make a comparison. But from my point of view, the good things about Angular are:

  • It’s a full framework, so very feature rich
  • Good documentation
  • Pretty popular, can find resources easily

In general, I think Angular is great for big application, but overkill for small hobby projects. Recently, with an idea for a new project, I started with Angular as usual. After a few days, I was wondering if I could find an alternative because Angular was too big/complicated for my needs.

I also wanted to try something new, simple, easy to learn, does not need a bunch of tools to setup/build/run. That’s when I remembered about Mithril. A few years ago I saw a discussion on a tech forum, but I wasn’t interested at the time. And now with 4-day weekend at home, I decided to try out Mithril. Let’s see how long it takes me to create a simple application, and how is it different from Angular.

What is Mithril?

From the homepage: Mithril is a modern client-side JavaScript framework for building Single Page Applications. It’s small (< 10kb gzip), fast and provides routing and XHR utilities out of the box.

It took me around 15 mins to go through the Getting started guide, and around 4 hours for the tutorial, which is pretty fast in my opinion.

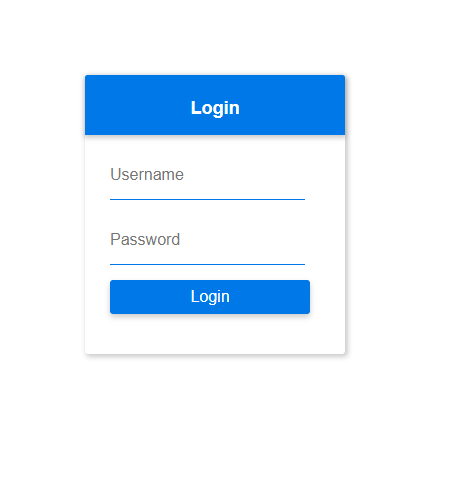
OK, let’s jump to the development. The sample application this time is very simple, just a login screen, a dashboard, probably CRUD operations. The purpose of this project is to test Mithril, so it uses some non-best practices.

Installation

This is pretty simple, just follow the guide.

Initialize the directory as an npm package:

1
npm init --yes

Install required tools:

1
2
npm install mithril --save
npm install webpack webpack-cli --save-dev

Edit package.json

1
2
3
"scripts": {
    "start": "webpack src/index.js --output bin/app.js -d --watch"
}

That’s all for the installation. Now I will create index.html file.

 1
 2
 3
 4
 5
 6
 7
 8
 9
10
11
12
13
14
15
<!doctype html>
<html>
    <head>
<meta charset="utf-8" />
<meta name="viewport" content="width=device-width, initial-scale=1" />
<title>Mini Issue Tracker</title>
<link rel="stylesheet" href="https://unpkg.com/purecss@2.0.3/build/pure-min.css" integrity="sha384-cg6SkqEOCV1NbJoCu11+bm0NvBRc8IYLRGXkmNrqUBfTjmMYwNKPWBTIKyw9mHNJ" crossorigin="anonymous">
<link href="style.css" rel="stylesheet" />
    </head>
    <body>
<div class="container">
</div>
<script src="bin/app.js"></script>
    </body>
</html>

It’s pretty straightforward, here I use Pure.css for easy styling. Now I need an entry point file index.js, this file works as a starting point for my application. This is where the routing is defined, but since I haven’t created any component, I just include Mithril in the module.

1
var m = require("mithril")

Mithril Components

Let’s create src folder to store the application source code. From the homepage, a Mithril component is simply an object that has a view method. OK let’s create the components folder, where our components are stored. Then create Login.js file inside. By default, Mithril views are described using hyperscript. There is also a tool to convert from HTML to Mithril template, Check out Converting HTML, super easy to use. JSX is also supported if you prefer HTML syntax. For now I just stick with hyperscript.

 1
 2
 3
 4
 5
 6
 7
 8
 9
10
11
12
13
14
15
16
17
18
19
20
21
22
23
24
25
26
27
28
29
30
31
32
33
34
35
36
37
38
39
var m = require('mithril');

module.exports = {
    view: function() {
        return m('div', {
            'class': 'pure-g login'
        }, [
            m('div', {
                'class': 'pure-u-2-5'
            }, ),
            m('div', {
                    'class': 'pure-u-1-5'
                },
                m('form', [
                    m('h1',
                        'Login'
                    ),
                    m('input', {
                        'placeholder': 'Username',
                        'type': 'text'
                    }),
                    m('input', {
                        'placeholder': 'Password',
                        'type': 'password'
                    }),
                    m('button', {
                            'class': 'pure-button pure-button-primary',
                            'id': 'loginBtn'
                        },
                        'Login'
                    )
                ])
            ),
            m('div', {
                'class': 'pure-u-2-5'
            }, )
        ]);
    }
}

I will go back and update index.js file.

 1
 2
 3
 4
 5
 6
 7
 8
 9
10
11
12
13
14
var Login = require('./components/Login');

m.route(document.body, '/login', {
    '/login': {
        render: function() {
            return m(Login);
        }
    },
    '/dashboard': {
        render: function() {
            return m.render(document.body, "Hello world");
        },
    }
})

Finally, create style.css in the same folder with index.html for styling.

 1
 2
 3
 4
 5
 6
 7
 8
 9
10
11
12
13
14
15
16
17
18
19
20
21
22
23
24
25
26
27
28
29
30
31
32
33
34
35
36
37
38
39
40
41
42
43
44
45
46
47
48
49
50
51
52
53
54
55
56
57
58
59
60
61
62
63
64
65
66
67
.login {
    height: 100%;
}

.login h1, .login input::-webkit-input-placeholder, .login button {
    transition: all 0.3s ease-in-out;
}

.login h1 {
    height: 60px;
    width: 100%;
    font-size: 18px;
    text-align: center;
    background: #0078e7;
    color: white;
    line-height: 150%;
    border-radius: 3px 3px 0 0;
    box-shadow: 0 2px 5px 1px rgba(0, 0, 0, 0.2);
}

.login form {
    box-sizing: border-box;
    width: 260px;
    margin: 200px auto 0;
    box-shadow: 2px 2px 5px 1px rgba(0, 0, 0, 0.2);
    padding-bottom: 40px;
    border-radius: 3px;
}

.login form h1 {
    box-sizing: border-box;
    padding: 20px;
}

.login input {
    height: 50px;
    margin: 10px 25px;
    display: block;
    border: none;
    padding: 10px 0;
    border-bottom: solid 1px #0078e7;
    transition: all 0.3s cubic-bezier(0.64, 0.09, 0.08, 1);
    background: linear-gradient(to bottom, rgba(255, 255, 255, 0) 96%, #0078e7 4%);
    background-position: -200px 0;
    background-size: 200px 100%;
    background-repeat: no-repeat;
}

.login input:focus {
    box-shadow: none;
    outline: none;
    background-position: 0 0;
}

.login input:focus::-webkit-input-placeholder {
    color: #0078e7;
    font-size: 11px;
    transform: translateY(-20px);
    visibility: visible !important;
}

.login button {
    border-radius: 3px;
    width: 200px;
    margin-left: 25px;
    box-shadow: 0 3px 6px 0 rgba(0, 0, 0, 0.2);
}

Let’s test it, change to project directory, type the command below:

1
npm start

trying-out-mithril-js-1.png

Final

That’s my accomplishment after 1 day into Mithril JS. I’m really impressed with the framework, it has simple API, small learning curve, doesn’t require a build step and the documentation is easy to understand. If you want to know what is the differences between Mithril and other popular frameworks, you can take a look at Framework comparison.

The only weakness I found with Mithril is the availability of learning resources. As far as I know, even though Mithril has been around for a number of years, it’s not really popular compared to react, Angular or Vue. Therefore, if you are stuck with some problems while working with Mithril, it could be a bit difficult to look for tutorials, articles, etc.

I will continue using Mithril in this project for a while, go over some more advanced features, and let see what are the other strengths and weaknesses.